If you like DIY projects as I do and having tools custom made for your
creative duties, you will love making your own stamps, they are so
addictive and it's a great way to have your own mark added easily into
canvas or art journals, cards, scrapbook, etc. I have a large collection and
I haven't get bored of making new ones yet and I've learned a few tricks
along the way and I am feeling generous so I am sharing with you this time
how to make yours.
Over the years I have reassured that drawing is the best skill an artist can
develop, it's applied in many areas and forms and it's the root to every creation,
at least, it is for me.
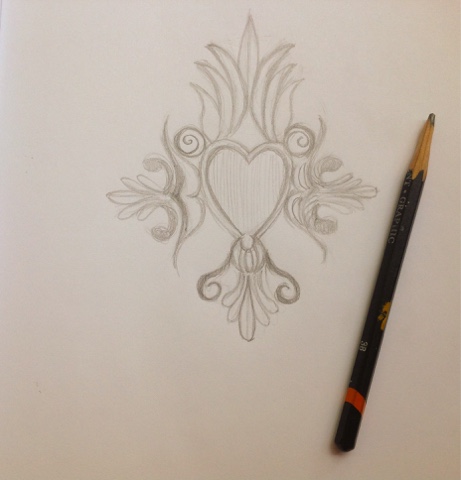
For this design, I found a silver heart over Pinterest and copied it, free hand
drew it until I was happy, you could also make a trace with a pencil and a vellum
paper, the continue to transfer it to the carving block, this time I use a speedy
ball carving block and tool, you should find them very easily over Amazon or in a
good art store.
I transferred my drawing to the vellum and now I am transferring it to the carving block, use a tape so it doesn't move out of place, transfer with a spoon or a bone folder, make sure all lines are transferred by taking peeks.
Once the design is transferred we'll cover the does and dont´s on using the carving tool.
You should use a small tip, the smallest for a better detail finish.
Don't use is as if it were diving, except for specific needs, mostly, you should go horizontally, following the block, you should be able to see both ends of the metal tip, only the tips is under, see photos bellow.
This should never be done!
Or this, were you can't see both sides of the tool, see how you can see a little baggie being lifted in the front of the tip? That will brake. Make some tests, practice in a side so you can learn the ways of the carving block and tool.
You should go around the entire design as if you were drawing it again, just be aware that you won't be able to erase anything so you should be very precise all the way from the beginning till the end of the carving, go one way, focus your view in were it starts, then were you will be finishing.
You may use a larger carving tool for cleaning the outer parts of the design, just be careful not to go over the previous carved line. Always go towards outside the design.
You should have something like this when finishing cleaning the design!
Now use your cutter to remove the unused parts, notice the direction of the knife, it goes inclined and outwards.
This bellow is the wrong way! Inwards will weaken your base!
Make sure it goes out or at least horizontally, leaving a firm base under your
stamp so it won't brake later.
You should end up with something like this...
Now you can finish carving your design, also keep being creative using the spaces
in blank, think how you could add more lines with your carving tool.
Now give it a test by using some water based ink, the spots that aren't perfect will show so you can clean them up easier by being able to see them, then stamp it to see how it prints and if it needs some final touches or little pieces to clean up and that's it, enjoy your stamp! Usually I keep them flat and some I mount on a heavy piece of wood, they last longer that way.
Enjoy carving and thank you for sharing this tutorial with your friends and family!
Sometimes commenting on the posts won't work so I ask you to please write me to monicatlink@hotmail.com if you need assistance or simply saying hi, thanks! ✨


No comments:
Post a Comment
Hi everyone! Got an idea for a post or a question about this topic? Feel free to drop your comments and petitions below. I read every one, and I'll personally respond or address them in a future article. Thanks for your input!