Showing posts with label visual tutorial. Show all posts

Sunday, May 14, 2017

Intentions Mixed Media Paper Dolls Tutorial

There is no better teacher than experience, 
that is why I believe it's important to experiment,
in any area of life, experimenting will teach you for sure.

The inner student is always hungry for knowledge and lessons
are always there to be acknowledged,  stay open for lessons,
that is what makes our lives richer and our understanding
of life and the meaning, even more profound.

This requires that you want to, nothing will be pushed
forcefully in to you and growing is not easy.

It  means that you will be vulnerable and that you may fail,
many times, sometimes in a big ways but like in science,
if you not fail, you can never learn what is right, specially for your self,
you are unique and your answers will be very different from others,
but that is OK, you are in your own path,
let us respect that and be patient with our selves as we grow, this is Love.

Fortunately, life doesn't have to be hard or boring all the time,
we can have our delights and be content while we are discovering who we
are and who we want to become, this changes and evolves and that always
amazes me deeply, we adapt and manage, we re write and re paint,
we accept and let go, we re new and continue, we survive and grow stronger.


Here are the materials I used:

Watercolors
Watercolor paper cut in the size you want for your paper dolls
B2 pencil
Kneaded eraser if needed
Soft brushes
Fabric, I used linen 
Sewing machine
Thread in darker color
Cutting tool
Heavy gel medium


Draw and paint softly your dolls, I go for layers
allowing each to fully dry, I used ochre for mine.


I used a fine cutter to remove the white part I don´t want.


Add more details with a fine pen, I used dark brown and then
painted over with more color until happy.


Make some halos and sew around them, paste them on the back
using some medium, sew some fabric around the the body, 
I used a square shape.

In the Chinese culture, the circle means heaven and
the square the earth.
Simple shapes can be powerful and with meaning!


This is the back, I covered the sewing and adding this
can be used to write a quote or signing your work!


Trust


The ability to feel deep inside that everything is good and 
that this good will be in our lives.  Understanding that everything
happens for a good reason, we might not see it at the moment but 
time will give us perspective to see clearer. 

*

Peace


The opposite of stepping in everyone so you get what you want,
peace means allowing and respect, slowing down and listening
what life is telling you, truly listening.

Peace is to live the days gracefully, in content with what you are doing,
knowing that you are in the right path.
Peace is going to bed at night with the knowledge that tomorrow
is a new day and that you will be having many more opportunities.


Open


Open, allowing, receiving, trusting, learning,
this word is many things, we have to dig deeper into words
to be able to understand more of them.

How are you open? 
How are you allowing?
How are you trusting?

Only you can do this for your self.


*

Love


The true force of it all,
The strength that resists and also lets go,
the energy that sustains everything,
us, life, the universe,
allows and reveals, teaches and embraces,
brings peace and fulfillment,
the base and the sustain, 
the self.


Life


Our journey, what we are, what we experiment with,
what we are allowing, were we are expanding, what we
are giving shape.


Here


In the here and now is were we live,
how is it you want it?
peaceful, loving, harmonious, trusting?

The power of intentions will be so as much as we understand the 
meaning of the words, you can write in your journal the words you
want and write more about the meaning of each, research and
understand so when you see your doll, it will tell you much more,
it will be the conversation you and her will have!  

Hang them on a 
place were you can have this conversation with them and keep 
writing in your journal this conversation, it will grow richer in time.

Thank you for being here, blessings!

Thursday, February 25, 2016

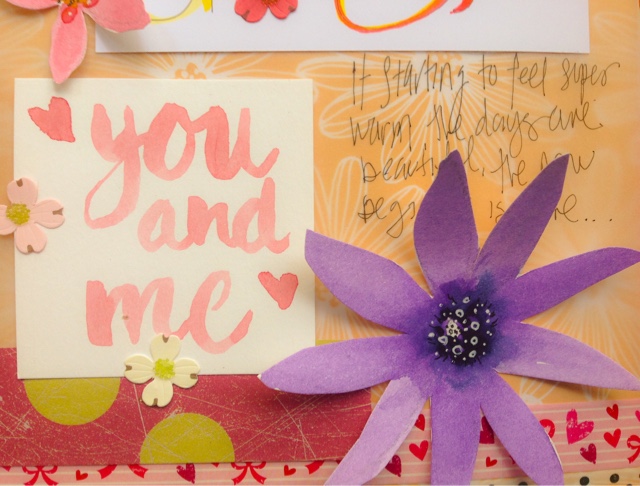
Spring is almost here!


I've been inspired by scrapbooking stuff since I can remember, 
I love the papers and the cute goodies that creative area offers and lately 
I've seen a new trend to me using these papers and embellishments  
for planners and I am in love with them, so many beautiful 
inspiring pages and new ideas are flourishing over Instagram 
and Pinterest and I've been collecting them in my walls.

Now I want and feel like giving it a try but I decided to make my own 
embellishments, why? First it´s fun and second, it gives my pages a unique feel. 

In the past, if I couldn't find what I wanted in my studio or a near store,
 it used to be frustrating and so now this has turned into 
something new and exiting to me! 

Making studies for watercolors is fun but I find it even more fun 
to put use to what I create and this is a perfect way to practice 
and create something out of that, besides all those goodies I have 
been collecting and that have been waiting patiently in the corner 
of my studio, they now are put into use, I also want to make some
 cards but that will come later in another post!


Here, you can see a little of the process, I start with the drawings of 
my elements and coloring them with watercolors, the size of this 
journal is small so I have to make the images fit in there.


Choosing the color of the background first makes it all easier, then 
all you have to do is match and combine the colors and or use contrast.


I cut out the images and start planning my design, if needed, I create 
more elements, like the flowers and the bird, which at the end didn't 
make it in there but it can be saved for other pages!


I am also a lover of words, those who have been following this blog 
for a while know how I been practicing and trying to find my voice 
in that area and find a way to enjoy it, make it easy and beautiful, no, 
it hasn't been easy, calligraphy is hard!!
But I am happier now and so I hand write my own sentiments, I have a 
journal just to practice and I sometimes cut them out when they are lovely
or copy the words in the paper I will use.


So how do you know what is right for your page you wonder?

It's all a matter of what you like and keep moving things around to see 
what looks better to you, I give the page time to set in, I wait for a day 
or two and do other things, like reading this new book about this man 
I so admire, Da Vinci, cook, clean up the studio and then come back 
to the page and if I still like it the way it is I glue it, if not, I keep
 working it, there is no hurry is it?

I am learning to be even more patient with my self, with my goals, 
respect the process in me, it's not easy, this world pushes you to hurry
 and make it big time, like you depended on it to survive!  I am learning
 that it is not true, that our processes should be like the one of nature, 
which is always there, silently showing us how things should be.   

Nature grows delicately and slowly or else anything wouldn´t form 
perfectly or it would brake at the end.

Building your base, your foundations, even in simple things like this,
can become a habit and have to be taken seriously and patiently, 
we might never be famous or important in the matters of 
the world but we should intend to leave it gracefully when our time comes, 
to live true, dig into our selves to know the most of our real selves and 
having built what matters, what really matters in terms of the spirit which
is what you really take, which is who you truly are.


Thank you for sharing my creative journey!
I love you!


Saturday, July 18, 2015

Mixed media magnets tutorial

Hello dear friends, I have been busy making some new magnets
but this time I took some photos to share with you the process
which I hope you enjoy, they are really easy, perhaps you think
not but I assure you they are, just follow the steps and as usual,
practice a few times and you´ll soon be able to even sell them if 
you want!  Enjoy!


Materials list:

wooden blocks, mine measure 2 1/2" x 2" (Use what you have)
white guesso
Favorite colors of acrylic paints, 
in this case I used Amsterdam and Phebeo Studio
Heavy gel medium I used Amsterdam
Soft gel medium I used glossy by liquitex
Digital collage sheets, find some here
(look for small items that could fit in your magnets)
(found in crafts stores)
Glitter
tiny golden and silver stars, flowers, etc... 
Words cut outs form books
Acid free crystal lacquer I use this one by Sakura
Brushes, water etc...


I buy the wood blocks sanded and with a coat of guesso, this takes 
away the unwanted part of the process, just ready to create! 
I go to my local carpenter and order what I want exactly but 
perhaps you can make them your self or find something else instead. 


I add a coat of ochre yellow paint, notice how I add texture in different ways.


I also have my digital collage sheets printed in advance, 
I just go through what I have and choose my favorites.
Cut the shapes sharply!  It will be a finer finish if you do a delicate
cut, no image should show any white paper in the corners.

Here is a couple of my images for you to use in your creations,
(personal use only, thank you!) Just click on the images, download 
and print in a regular size paper, I use a good quality for better results!


Work a few magnets with collage, arrange the papers as you like best,
move them around to see what clicks on you!


I also use my own work, I make my own collage sheets with my whimsical
characters, perhaps is something you want to consider to be unique.

Use your soft gel medium to glue the papers and add a coat on top, let dry.


Using small stamps and paint, you can add interest to your design, 
notice I also work on the sides.


You should have something like this so far...


With some heavy gel medium attach the magnets on the center of the back,
I used to paint the back too but not anymore, as you prefer!  The medium takes
a couple of hours to dry, time to go out and have some lunch! :)


Add some words in a few of your magnets and then
this last part is when you add some sparkle on top of them!  

I love everything shiny!  Add a coat of soft gel medium somehow 
generous and sparkle the stars and glitters were you want them, be
careful not to cover the faces or anything you want to show!

When the medium is completely dry, add a coat of the
acid free crystal lacquer to cover everything, it will take a few
hours to dry, I usually let it dry overnight. 

You could also use a varnish to seal everything. 


That´s it! See? it´s easy! Now go make some and have lots of fun! :) 


Gallery


I hope you enjoyed this tutorial, share with your friends
and family some wonderful pieces you create! 
Thanks for being here!